Skip to content
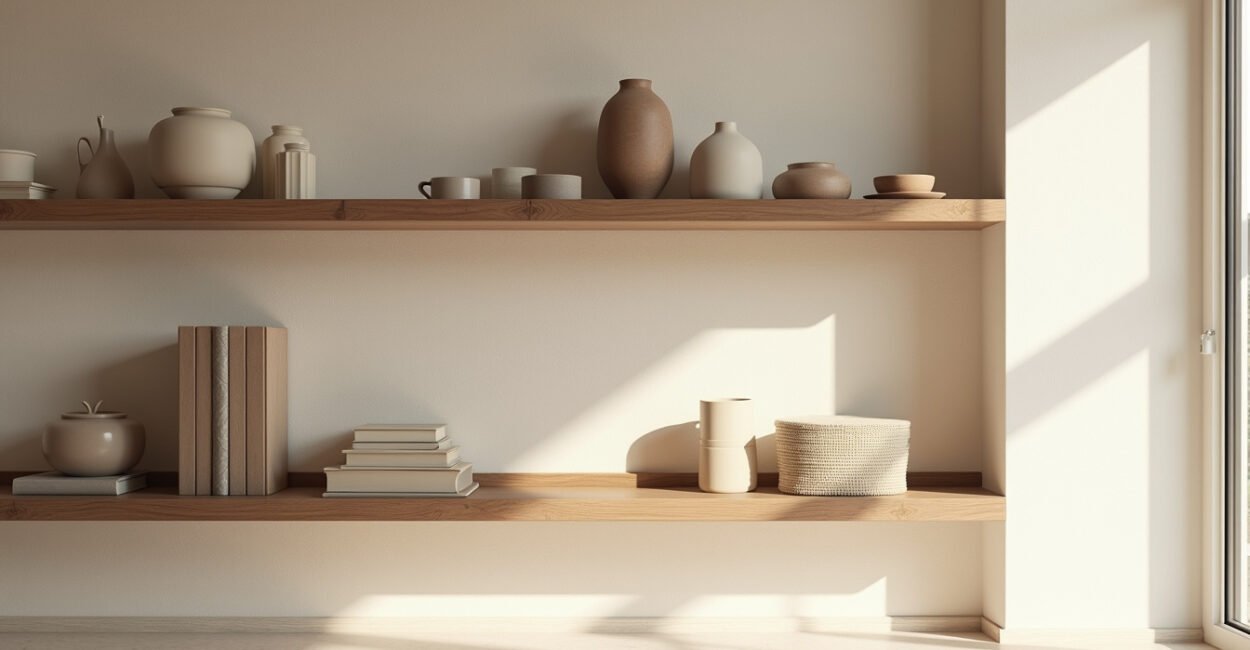
Are wall-mounted shelving units with hidden brackets that leave the shelf surface appearing to “float” against the wall. They range from thin picture ledges to deep boxed shelves and are made from wood, metal, glass, or engineered materials. Structurally, their load capacity depends on bracket design, anchor type, and wall substrate—proper mounting is non-negotiable for safety and long-term use.
Pontos-Chave
- Floating shelves maximize perceived space in small halls by keeping the floor clear while allowing layered styling and quick access to daily items.
- Cabinets provide closed storage that reduces visual clutter and secures items, which often makes them better for chaotic entryways or family homes.
- Choose shelf depth, spacing, and weight rating based on intended use: 8–12″ depth for keys and mail, 12–16″ for baskets and small bags, and properly rated anchors for loads over 25 lbs.
- Mixing a low cabinet with a floating shelf above often offers the best balance of storage and openness in very narrow hallways.
Why Floating Shelves Define Space Savings in Narrow Halls
Floating shelves reduce floor obstruction and maintain sightlines, which is crucial in narrow halls where every inch of visual width matters. Because they mount directly to the wall, they free up the walking plane and allow shoes, shoe benches, or slim consoles to sit beneath without collision. The result is a hall that feels wider and flows better. This effect is measurable: keeping the center 24–30″ of a hallway clear preserves comfortable single-file movement.
Load Capacity and Real-world Limits
Not all floating shelves perform the same. Shelves with concealed steel brackets that engage studs will reliably hold 50–100 lbs per linear foot; those relying on drywall anchors may only carry 10–25 lbs. For heavy items—tools, stacks of books, or heavy ceramic vases—use through-bolt shelving or mount into studs. If studs aren’t available, toggle bolts or Molly anchors rated for shear loads are the next best option.
Visual Scale and Perceived Width
Shallow shelves (8–10″) keep the walking path unobstructed and reduce the “protrusion” effect. Using lighter finishes or mirrors behind shelves increases perceived width. Staggering shelf heights creates vertical rhythm without crowding. For very narrow halls (under 36″ wide), keep total protrusion under 6–8″ per side to preserve a 24–30″ clear path.
When Cabinets Outperform Floating Shelves for Entry Storage
Cabinets win when you need concealed, secure, or childproof storage. They hide clutter, reduce dust on stored items, and can integrate locks, shoe racks, or charging drawers. In family homes or shared apartments where items accumulate quickly, cabinets help maintain calm by removing visual stimuli. Built-in or shallow-depth cabinets (10–14″) can deliver comparable spatial savings while offering more organization options.
Security and Maintenance Advantages
Cabinets protect items from accidental knocks and spills. They also limit dust, so seasonal items stay cleaner. Hinges and soft-close mechanisms add longevity and perceived quality. From a maintenance standpoint, closed cabinetry often lowers the time spent tidying a hall—close the door, the space looks tidy. For rental units, modular cabinets with removable inserts offer flexibility without permanent alteration to walls.
Trade-offs: Footprint Versus Flexibility
Cabinets usually demand more visual mass. Even slim cabinets can feel heavy if poorly proportioned. They also require door swing clearance; pocket doors or sliding fronts mitigate that, but add complexity. Floating shelves, conversely, are easy to change and restyle. The right choice depends on user habits: if you need to hide clutter daily, favor cabinets; if you prefer display and quick access, floating shelves are better.

Sizing Rules of Thumb for Tiny Entryways and Halls
Proportion matters more than absolute size. For items like keys and mail, 8–12″ deep shelves suffice. For baskets or small purses, 12–16″ depth is safer. Shelf height spacing of 10–12″ suits display items; 14–18″ fits baskets and bags. Maintain a 24–30″ clear center path in narrow halls. For cabinets, 10–14″ depth provides concealed storage without blocking traffic.
Measuring and Mock-ups
Use painter’s tape to map shelf depth on the wall and test walkability before drilling. Mark stud locations and map the intended load. When planning multiple shelves, stagger depths to avoid elbow clash. Consider a 36–42″ mounting height for frequently used surfaces; lower shelves at 30–34″ if you intend to sit on an adjacent bench.
Weight Planning and Materials
Calculate expected loads: small daily items ~5–15 lbs; baskets ~10–30 lbs; electronics or books ~30–60 lbs. Use hardwood, plywood, or metal brackets for higher loads. Avoid long, unbraced runs—span limits increase deflection. For spans over 36″, add midpoint support or choose a floating cabinet instead.
Styling Strategies: Make Floating Shelves Look Intentional, Not Cluttered
Styling is both practical and perceptual. Group items into triads—one functional item, one decorative, one soft textile like a folded scarf—to balance utility and visual calm. Use baskets and boxes to corral small objects; these preserve the open feel while hiding mess. Keep color palette limited to two to three tones to avoid visual noise in tight spaces.
Layering and Depth Control
Place thin items like frames or slim vases at the back and tactile items frontward to avoid knock-offs. Mirrors behind shelves reflect light and give depth. Limit the number of objects to 3–5 per linear foot to prevent visual crowding. Rotating displays seasonally keeps the hall fresh without overhauling the layout.
Combining Shelves and Cabinets for Balance
Pair a low cabinet for hidden storage with a floating shelf above for keys and mail. This combo offers a tidy surface to drop items and a place to display personal touches. Keep the shelf narrow (8–10″) to maintain clearance. The cabinet absorbs bulk while the shelf preserves openness and quick access.

Common Mistakes and How to Avoid Them
- Skipping stud location checks: always use appropriate anchors or mount into studs for loads over 25 lbs.
- Choosing deep shelves for narrow halls: deep shelves reduce clearance and increase collision risk.
- Overstyling with small items: too many small pieces looks cluttered; use containers to group them.
- Ignoring door swing and bench clearance: measure clearance with doors open and people sitting before final install.
Each error has a practical fix: mock-up with tape, use rated anchors, limit shelf depth, and plan clearance. These small steps prevent most regrets and retrofit costs.
Comparative Specifications: Floating Shelves Vs. Cabinets
| Feature | Floating Shelves | Cabinets |
|---|---|---|
| Typical depth for halls | 8–16″ | 10–14″ |
| Visual impact | Low mass, airy | Higher mass, closed |
| Best use | Display, quick-access items | Concealed storage, security |
| Approx. load (proper anchors) | 10–100+ lbs depending on mounting | 50–200+ lbs (frame-supported) |
Choose based on the mix of display, weight, and desire to hide clutter. When in doubt, a hybrid solution often yields the best result.
Installation Checklist and Recommended Hardware
Before installing, verify wall type (drywall, plaster, masonry), stud spacing, and the intended load. For stud-mounted shelves use 3/8″ lag bolts. For hollow walls choose high-quality toggle bolts or rated hollow-wall anchors. Metal brackets with 12–16-gauge steel are durable for heavier loads. Use a level, stud finder, and torque wrench or driver with clutch. Finally, seal wooden shelf bottoms and edges to prevent moisture ingress in humid entryways.
Tools and Materials List
Essential tools: stud finder, drill with appropriate bit, level, tape measure, and screwdrivers. Materials: brackets or floating hardware kit, fasteners rated for wall type, wood or metal shelving, wall filler, and finish hardware. For renters, freestanding slim cabinets or rails may be better than permanent anchors.
When to Call a Pro
If mounting into masonry, running plumbing or wiring behind the wall, or supporting loads over 100 lbs per shelf, hire a contractor. A pro ensures correct anchors, fire-blocking, and code-compliant fixes. For custom cabinetry or integrated electrical features, a carpenter or cabinetmaker will deliver a cleaner, longer-lasting result.
How to Apply This Knowledge
Decide first what you must store versus what you want to display. Measure your hall, mark a 24–30″ clear path, and choose shelf depth accordingly. If daily clutter needs hiding, prioritize cabinets; if you prize openness and styling, pick floating shelves. For most tight halls, a low cabinet with a narrow floating shelf above is the pragmatic winner. Test with tape, pick rated hardware, and plan for future changes.
Próximos Passos Para Implementação
Map your priorities: visibility, capacity, and daily habits. Create a simple plan with measurements, mock-ups, and a hardware list. Start small—install one shelf or a low cabinet, then adjust based on use. If you anticipate heavy loads or built-ins, budget for professional installation. Finally, document anchor types and load ratings for future owners or renters. These steps keep your hallway functional, safe, and visually light.
What is the Maximum Reliable Weight for a Floating Shelf?
The maximum reliable weight of a floating shelf varies by bracket type and wall substrate. Stud-mounted steel brackets commonly support 50–100 pounds per linear foot when fastened with 3/8″ lag bolts into solid studs. Anchors in drywall without studs drop capacity to roughly 10–25 pounds depending on anchor type—toggle bolts perform better than plastic anchors. For loads exceeding 50 pounds per shelf, through-bolting or a cabinet solution is safer. Always consult manufacturer load specs and test incrementally when possible.
Can Floating Shelves Be Installed on Plaster or Masonry Walls?
Yes. Plaster requires careful pilot holes and anchors designed for layered material; it’s common to find wooden lath and avoid over-tightening screws to prevent cracking. For masonry—brick, concrete, or CMU—use masonry anchors such as sleeve anchors, concrete screws, or wedge anchors with appropriately sized drill bits. In both cases, choose anchors rated for the expected load and account for potential vibration or freeze-thaw if the entryway sees exterior exposure. When in doubt, consult a professional installer.
Are Floating Shelves Better Than Cabinets for Rental Apartments?
Floating shelves are often preferable in rentals because they are less invasive and can be removed with minimal repair if installed with appropriate anchors. Slim cabinets can be used if they are freestanding or mounted using non-destructive brackets. Landlord rules vary, so always check your lease before drilling. Modular, freestanding units or rail systems that clamp or hang over doors offer an alternative that provides storage without permanent wall alterations.
How Do I Prevent Sagging on Long Floating Shelves?
Prevent shelf sag by limiting unsupported span and choosing stiff materials. Solid hardwood or plywood with a steel-reinforced bracket resists deflection better than thin MDF. For spans over 36″, add a midpoint bracket or use thicker stock (1″ or more) and internal reinforcement like a steel rod. Attach brackets into studs where possible; for long runs, consider segmented shelves with seams over supports. Regularly check for loosened fasteners and address small sag early to avoid failure.
What Combination of Shelves and Cabinets Works Best in Very Narrow Halls?
In halls under 36″ wide, a low, slim cabinet (10–12″ deep) paired with a single narrow floating shelf above offers an optimal mix. The cabinet handles shoes and concealed clutter while the shelf provides quick-access space for keys and mail. Keep the cabinet height low (24–30″) if you use a bench or sitting surface. Use shallow shelf depth (8–10″) to preserve clearance. This hybrid reduces visual mass while maximizing practical storage and maintains a clear 24–30″ walking path.