Skip to content
Empty walls do not need expensive canvas prints to feel finished. If you know how to turn old frames into wall art, you can create pieces that look collected, layered, and intentional without buying new decor for every blank spot in the house. The trick is not just hanging frames; it is giving them a new job, a new surface, and the right visual rhythm.
This is an informational project, so the goal is practical: what to use, how to build it, where it works best, and where it can fall flat. I’ll walk through the easiest ways to repurpose picture frames, the tools you actually need, and the styling choices that make the finished wall look designed instead of improvised.
The Essentials
- A frame with good shape matters more than a perfect frame with a boring finish; ornate profiles, thin black frames, and weathered wood all work well.
- The fastest wall art upgrades come from swapping the insert: textured paper, fabric, dried botanicals, typography, and mesh-backed objects all create dimension.
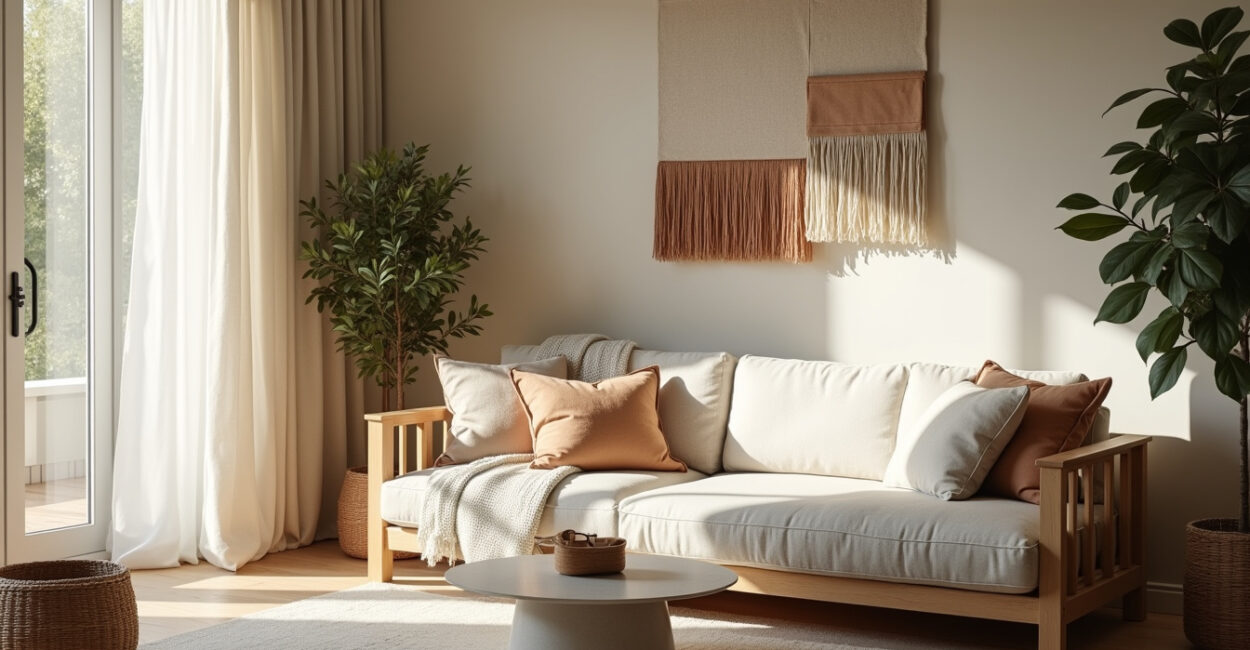
- Frames look most expensive when you repeat one finish at least twice on a wall, even if the art inside each frame is different.
- Old frames can hide flaws if you use matte paint, kraft paper, linen, or a deep mat that creates visual breathing room.
- The biggest mistake is overfilling a wall with small pieces that have no shared color, scale, or spacing rule.
Turn Old Frames Into Wall Art with Simple Materials and a Clear Plan
Technically, this is a frame repurposing project: you are taking an existing picture frame and converting it into decorative wall decor by changing the insert, backing, finish, or function. In plain English, that means you keep the structure and redesign the look. That is why this works so well for renters, budget decorators, and anyone who has a stack of frames in the closet.
The best part is that you do not need a full craft room. A screwdriver, craft knife, scissors, acrylic paint, painter’s tape, and a hot glue gun cover most versions of the project. If you want a cleaner finish, add archival tape, foam board, and a small level. For safer hanging, use the right wall anchor for drywall or plaster; the U.S. Department of Energy’s home hanging guidance is a useful reminder that placement and hardware matter as much as the decor itself.
What makes an old frame feel like wall art is not age alone; it is contrast between the frame’s structure and the new surface you place inside it.
Choose the Right Frame First
Not every frame is worth rescuing. If the corners are split, the backing is warped, or the glass is cracked beyond cleaning, skip it unless the frame has real character. Heavy gilt frames, narrow modern frames, and wood frames with visible grain usually give you the best results. Plastic frames can work too, but they often need a matte paint finish to look intentional.
Match the Frame to the Room
A formal dining room can handle ornate molding and gold leaf. A hallway or entryway usually looks better with slimmer profiles and calmer colors. In a nursery or casual family room, painted frames with soft textures feel less rigid. The room should decide the frame style, not the other way around.
Prep, Clean, and Paint Without Making the Frame Look Cheap
Good prep is what separates polished wall art from a craft-fair leftover. Dust, grease, and flaky varnish can ruin paint adhesion, especially on older wood frames. Clean first with a damp cloth and mild soap, then let the piece dry completely before sanding. If the frame has glossy finish or residue, a light sanding with 220-grit paper helps the new paint grip.
When to Prime and When to Skip It
Primer is worth it on dark wood, slick plastic, or any frame with stain bleed. If the frame is already matte and you are using a high-quality acrylic or chalk paint, you can sometimes skip primer. That said, primer gives more predictable color and helps the finish look even after one or two coats. For antique frames, a stain-blocking primer is the safer choice.
Paint Finishes That Work Best
- Matte paint hides flaws and works well for rustic or modern walls.
- Satin paint gives a soft sheen and is easier to wipe clean.
- Metallic wax or leafing works only when the frame shape already has detail worth highlighting.
One thing I learned the hard way: a glossy finish can make a budget frame look worse, not better, because every dent and brush mark catches light. A flat finish is more forgiving, especially if the frame came from a thrift store or garage sale.

Fill the Frame with Materials That Look Intentional, Not Temporary
The insert is where the project becomes wall art instead of “a frame with something in it.” You can use art prints, of course, but the more interesting option is to build texture. Linen, watercolor paper, wallpaper scraps, pressed flowers, book pages, and vintage sheet music all bring different visual weight. The National Archives education resources are surprisingly useful if you want ideas for archival-style papers, documents, or reproduction ephemera that feel authentic rather than random.
Best Insert Ideas by Style
| Style | Best Insert | Why It Works |
|---|---|---|
| Modern | Black-and-white print, line drawing, grid paper | Strong contrast and clean edges |
| Farmhouse | Washed linen, burlap, faded botanicals | Soft texture and natural color |
| Gallery wall | Mixed prints with a repeated palette | Creates variety without visual noise |
| Vintage | Sheet music, maps, aged paper | Feels collected and specific |
Add Depth with Mats and Spacers
A mat board is not just decorative padding. It gives the art breathing room and helps a small image look deliberate instead of undersized. Spacers create shadow and depth, which is useful if you are framing textiles, dried flowers, or objects that should not press flat against glass. In practice, depth is what makes the piece feel custom.
A frame with a thoughtful mat often looks more expensive than a larger frame with no visual margin at all.
Create Dimensional Pieces from Objects, Fabric, and Found Materials
This is where old frames become genuinely interesting. If you remove the glass and backing, the frame can hold three-dimensional objects: small rattan pieces, dried stems, vintage keys, fabric swatches, or a favorite postcard layered over textured paper. The point is not to cram in more things. The point is to give the frame a focal point and enough empty space to let the object read clearly.
Three Easy Dimensional Methods
- Shadow-box layering: Mount a small object on foam board so it sits away from the frame glass.
- Textile framing: Stretch fabric or a linen napkin over backing board and staple it neatly.
- Mixed-media panel: Combine paper, ribbon, dried stems, and a small label for a museum-like look.
Violin shops, flea markets, and estate sales often have frames with odd proportions that look useless at first. Those are the ones worth rescuing. A narrow oval frame, for example, can become a very elegant botanical piece if you keep the composition centered and spare. The shape does the heavy lifting.
Style a Wall So the Frames Feel Curated, Not Random
The fastest way to make a wall look good is to decide on a rule and repeat it. That rule can be color, spacing, frame finish, or subject matter. If everything changes at once, the wall turns noisy. If one variable stays consistent, the whole arrangement feels intentional. Design guides from places like Smithsonian Magazine’s arts coverage can help reinforce that principle: strong display often relies on rhythm more than on individual pieces.
Three Reliable Layouts
- Grid layout: Best for matching frames and cleaner rooms. It brings order to hallways and offices.
- Salon wall: Best for mixed frame sizes, but it needs one unifying thread, such as color or matting.
- Linear row: Best over a sofa, sideboard, or bed when you want calm, horizontal movement.
Spacing Rules That Usually Work
Keep 2 to 3 inches between small frames and 3 to 4 inches between larger ones. That range is forgiving enough to look balanced without feeling stiff. If the wall is large, give the pieces more negative space. If the wall is narrow, choose fewer, larger frames so the arrangement does not feel cramped.
Where This DIY Works Best and Where It Can Miss the Mark
The method works best on blank walls that need personality more than expensive art: hallways, entryways, laundry rooms, bedrooms, home offices, and awkward corners. It also works well when you already have a color story in the room and need wall pieces that support it. It can miss the mark if you use too many finishes, too many tiny objects, or frames that are damaged beyond a clean repair.
Best Use Cases
- Rental spaces where you want impact without permanent built-ins.
- Budget makeovers where most of the room is already furnished.
- Rooms with sentimental objects that deserve a display, not a drawer.
When to Stop and Replace the Frame
Not every old frame deserves a second life. If the material is rotting, the corners keep opening, or the profile clashes so hard with the room that every other decision has to fight it, replacement may be smarter. That is not failure; it is editing. Good decorating often depends on removing the wrong piece.
Finish the Wall with Hardware, Balance, and a Quick Test
Before hanging anything, lay the frames on the floor and photograph the arrangement. A phone camera makes spacing problems easier to spot than your eyes do in real time. Then check balance: one heavy frame can anchor a group, but too many heavy frames create a wall that feels stubborn and top-heavy. Use proper hanging hardware for the weight of the frame, not just the wall surface.
For a final check, step back to the room’s main entry point. If the arrangement reads as a single composition from there, you are done. If it looks scattered, reduce the number of pieces or repeat one frame finish across the group. That one step usually fixes more problems than adding another object ever will.
What to Do Next
Pick three old frames and assign each one a different role: one for texture, one for image, and one for dimension. That is the fastest way to keep the project from becoming too matched or too messy. If you want the wall to feel elevated, choose one repeatable rule—same mat color, same finish, or same subject—and commit to it across the set.
Start with the wall that bothers you most. The blank space you ignore every day is usually the one that will benefit most from a simple frame transformation. Test the layout on the floor, hang the pieces with the right anchors, and adjust once before calling it finished.
Can You Turn a Broken Frame Into Wall Art?
Yes, if the damage is limited to cosmetic wear, loose joints, or a scratched finish. A frame with minor flaws often becomes more appealing after sanding and repainting. If the corners are structurally weak or the frame is warped, you may need to reinforce it before hanging it. When the damage is severe, using the frame as a shallow shadow-box or layered decor piece is usually smarter than forcing a standard picture display.
What Works Better: Paint, Paper, or Fabric?
It depends on the room and the mood you want. Paint is best when the frame itself has good shape and you want a clean update. Paper works best for graphic impact and easy swaps. Fabric adds warmth and texture, which helps in bedrooms and casual living spaces. The strongest designs often combine two of these, such as painted frames with fabric inserts or paper art with a linen mat.
How Do You Keep the Wall from Looking Cluttered?
Use fewer colors, larger negative space, and one repeating element. Clutter usually comes from mixing too many frame sizes, finishes, and image styles at once. If the wall starts to feel busy, remove one piece before adding anything else. A well-spaced arrangement with a clear visual rhythm will always look more intentional than a crowded wall filled edge to edge.
Do Old Frames Need Glass to Work as Wall Art?
No. In fact, some of the most interesting versions work better without glass because the texture is easier to see. Fabric, dried stems, layered paper, and objects gain depth when they are not flattened behind a reflective surface. Glass still makes sense for fragile prints or archival pieces, but it is not required for a good result. Sometimes removing it makes the whole composition feel more relaxed.
How Do You Make the Result Look High-End on a Small Budget?
Choose a restrained palette, repeat one finish, and use mats or spacers to create depth. Those three moves matter more than the cost of the frame itself. A thrifted frame painted in a matte tone can look more expensive than a new one if the materials inside are chosen carefully. Budget decor fails when every piece tries to stand out; it succeeds when the wall looks edited and calm.