Skip to content
Peel-and-stick wall art for renters is removable decorative wall treatment built with a pressure-sensitive adhesive backing, so it can be applied cleanly to finished walls and removed with far less risk than traditional wallpaper or painted murals. In plain English: it gives you a custom look without making your apartment feel like a construction site.
That matters now because renters want spaces that feel intentional, but lease rules still limit what they can change. The gap between “temporary” and “cheap-looking” is exactly where well-made peel-and-stick art solves a real problem. When it is built on the right material, sized for the wall, and installed on a properly cured painted surface, it can look far more polished than framed prints alone.
In practice, what separates a strong result from a disappointing one is not the adhesive itself; it is the prep, the substrate, and the finish. I’ve seen walls look flawless for years when the installer respected paint cure time, cleaned the surface with care, and used a removable mounting system that matched the wall’s condition. I’ve also seen the opposite: curling edges, trapped dust, and torn paint because the product was rushed onto a damp or low-quality surface.
Key Takeaways
- Removable wall art works best when the wall surface is smooth, fully cured, and free of dust, wax, or texture that weakens adhesion.
- The best results come from pairing a lightweight printable film or fabric substrate with a renter-safe mounting method such as removable adhesive strips or low-tack transfer systems.
- Durability depends more on preparation and finish protection than on whether the art is “peel-and-stick” by name.
- Most failures happen at the edges: poor trimming, moisture exposure, or using the wrong adhesive for matte, eggshell, or textured paint.
- For renters, the safest goal is reversible installation, not permanent bonding.
How Peel-and-Stick Wall Art for Renters Works on Real Apartment Walls
Define the Method Before You Buy Anything
Technically, this is a removable wall-decor system that uses a pressure-sensitive adhesive or a separate low-tack mounting layer to hold a printed or cut decorative surface to the wall. The wall itself is not the art medium; it is the display surface. That distinction matters because the adhesive has to bond to paint, not drywall paper, and that bond changes depending on sheen, texture, humidity, and wall age.
In practical terms, you are choosing between two broad approaches. One uses an adhesive-backed print material, often vinyl or polyester film. The other uses a printed panel or fabric piece attached with removable strips, such as Command removable adhesive products. Both can work in rentals, but they solve different problems. The first gives a seamless graphic surface; the second is easier to remove and usually safer for fragile paint.
Why Renters Need a Different Standard Than Homeowners
Homeowners can tolerate a little more risk because they control repainting and repairs. Renters cannot. A small adhesive failure can turn into a lease issue, a security-deposit deduction, or both. That is why “removable” is not enough as a label. You need a system that is reversible under real-world conditions, not just in a marketing claim.
Who works with interiors knows this well: a product that releases cleanly on a fresh satin wall may behave badly on a five-year-old matte wall with soft paint. That’s why you should treat every installation as a material-matching exercise, not a decorating impulse.
What Makes the Finish Look High-end Instead of Temporary
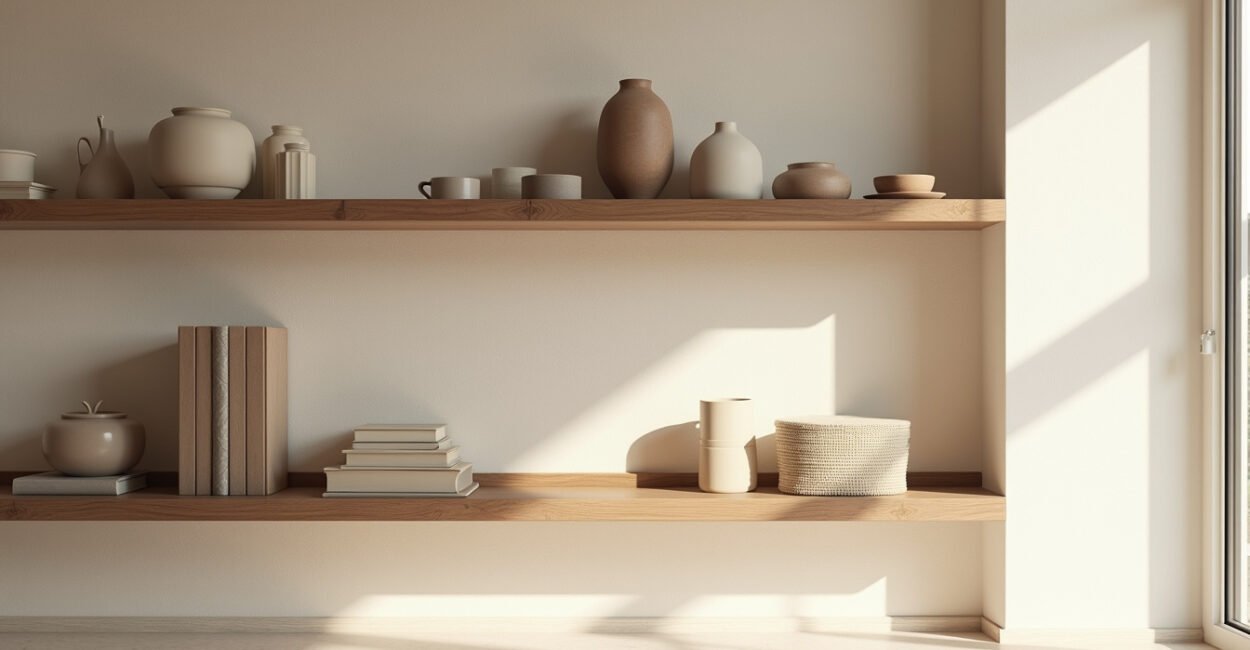
The polished look comes from three things: edge quality, surface flatness, and visual continuity. Clean cuts matter because ragged edges catch light. Flat mounting matters because bubbles and waves telegraph instantly under indirect lighting. Visual continuity matters because a cohesive panel, mural, or pattern reads as custom work, while random patches can feel improvised.
If you want a more architectural result, think like a mural installer, not a sticker user. That means measuring carefully, aligning to a plumb reference, and selecting a matte or low-sheen finish that doesn’t reflect every imperfection in the wall.
Materials, Adhesives, and Surfaces That Actually Work
Choose the Right Substrate for the Visual Goal
The substrate is the base material carrying the design. Common choices include adhesive vinyl, printable polyester film, removable fabric, and lightweight poster stock with a mounting layer. Vinyl gives crisp graphics and strong color, but it can show seams if the wall is not perfectly flat. Fabric-based systems tend to be more forgiving during installation and removal, especially in rentals where repainting risk matters.
If your goal is gallery-like calm, fabric and matte-coated films usually beat glossy vinyl. If your goal is bold graphics with sharp edges, high-quality printable vinyl is the better tool. Cheap versions of either are a false economy. They often shrink, curl, or yellow faster than they save you money.
Match the Adhesive to the Wall Paint, Not the Marketing Claim
Paint sheen changes adhesion behavior. Flat and matte paints can hold adhesive well at first, but they are also more vulnerable to paint lift during removal. Satin and eggshell paints usually release more cleanly, though the bond can be slightly less aggressive. Freshly painted walls are the danger zone; most coatings need enough cure time before adhesive contact, and that wait can be longer than a casual installer expects.
For surface preparation, follow the manufacturer’s instructions and check the wall condition before installation. The U.S. Consumer Product Safety Commission provides general safety guidance on household products and materials at cpsc.gov, while paint and surface compatibility guidance is often better explained by product manufacturers and building-material references such as Bob Vila’s renovation guides. The exact adhesive choice should always be tested on a small hidden area first.
Use a Practical Compatibility Checklist
Before you commit, confirm the wall is dry, clean, and fully cured. Remove dust with a microfiber cloth. Skip greasy cleaners and waxy sprays, because they leave a residue that weakens adhesion. If the wall has heavy texture, porous paint, or visible sanding marks, expect the edges to work harder than they would on a smoother surface.
- Best wall conditions: cured satin or eggshell paint, smooth drywall, clean primer, low humidity.
- Moderate-risk conditions: matte paint, light orange-peel texture, walls near HVAC vents.
- High-risk conditions: fresh paint, heavy texture, damp areas, flaking previous patches.

Designing the Layout So It Looks Custom, Not Temporary
Measure for Visual Balance, Not Just Wall Coverage
A lot of DIY wall art fails because the layout is mathematically filled but visually unbalanced. The eye cares about focal points, negative space, and how the art relates to furniture. A design above a sofa, for instance, should usually span roughly two-thirds to three-quarters of the sofa width to feel anchored. That ratio is not a law, but it is a reliable starting point.
Measure the wall, then measure the furniture, then decide what needs to breathe. A temporary apartment still benefits from the same composition rules used in higher-end interiors. If you center everything blindly, you often end up with a result that feels smaller than the room.
Choose the Right Artwork Type for the Room Function
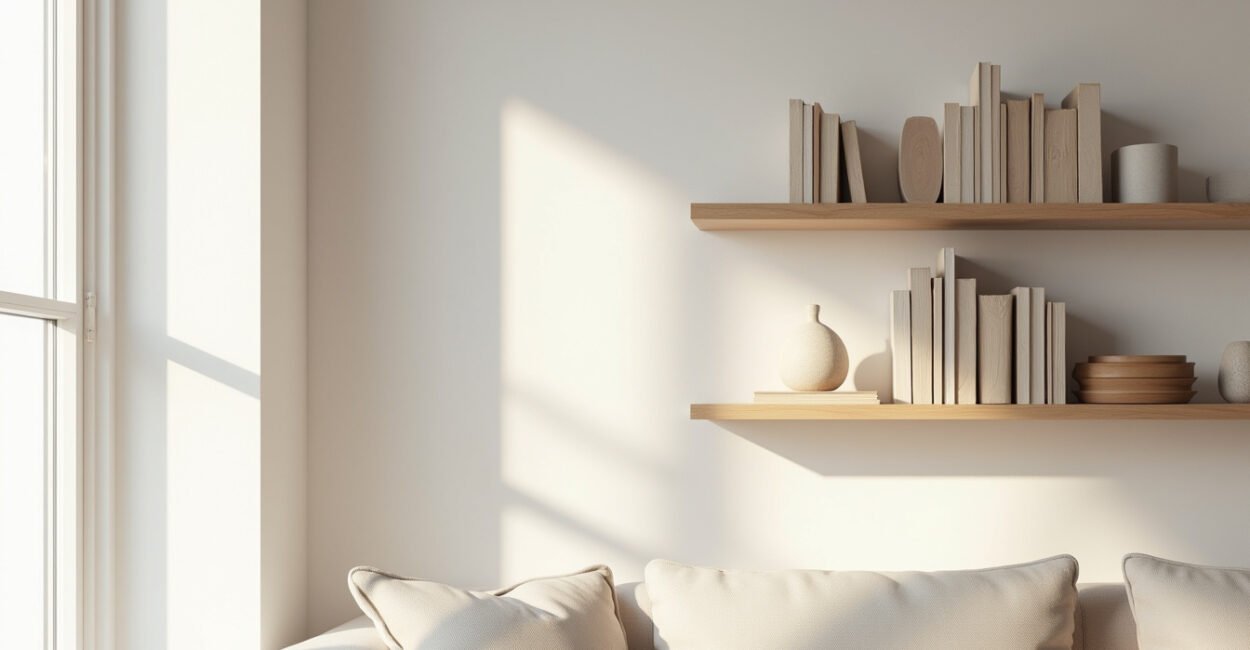
Bedrooms usually benefit from quiet patterns, soft abstraction, or one large composition with limited contrast. Living rooms can carry bolder graphics because they already function as social spaces. Entryways need faster visual payoff, which means strong vertical alignment or a statement panel. Kitchens and bathrooms are tougher because humidity, splash zones, and frequent cleaning narrow your material choices.
For renters, the smartest designs are often modular. Think set of panels, arched shapes, or repeated forms that can adapt if you move to a larger or smaller apartment. That flexibility is one reason removable wall décor has become so useful in temporary housing.
Plan Around Seams, Edges, and Lighting
Seams are where a project reveals whether it was designed well. If you use multiple panels, line up critical visual elements away from the seam line. If you use a full-sheet mural, plan the layout so the most noticeable join lands in a visually quiet area. Lighting matters too; side light from windows or lamps exaggerates any ridge, overlap, or dust speck trapped during installation.
For a smoother result, mock up the composition on the floor first or tape paper templates to the wall before cutting the final material. That small step saves more mistakes than any fancy tool.
Installation Steps for a Clean, Renter-Safe Finish
Prep the Wall Like a Professional, Not a Hobbyist
Start by cleaning the wall with a dry microfiber cloth, then a lightly damp cloth if the surface allows it. Let it dry fully. If the wall is newly painted, wait for complete cure time based on the paint manufacturer’s recommendation. Do not apply adhesive to a wall that still smells strongly of paint or feels tacky under light pressure. That is one of the fastest ways to get failure later.
The wall should also be cool, dry, and free of oils from hands or furniture. If you are installing in a climate with seasonal humidity swings, run the HVAC long enough to stabilize the room. Adhesives behave differently in damp summer air than they do in dry winter conditions.
Apply in Sections and Control Tension
Once the piece is positioned, install from the center outward or from one controlled edge, depending on the format. Use a squeegee with a soft edge or a felt applicator to push air out gradually. Do not stretch the material as a shortcut for alignment. Stretched adhesive film may look fine for a day, then contract and pull itself loose at the corners.
When an installation works, it usually looks calm and uneventful. That is the point. Slow application, firm pressure, and checked alignment beat speed every time. A rushed install is where bubbles, wrinkles, and edge lift begin.
Seal the Edges Only If the System is Designed for It
Some systems benefit from an edge-safe finishing pass, such as firm pressure with a roller or edge tool. Others do not need any additional sealing because extra heat or pressure can damage the removable bond. Read the product specs. If you’re using removable wall strips or a fabric print system, forceful edge sealing can actually reduce removability.
That is one area where expert opinions diverge. Some installers like extra reinforcement near corners; others prefer a pure low-tack system to preserve clean removal. I side with the second camp for rentals, because the security-deposit risk is usually worse than a tiny cosmetic compromise.
How to Make It Last Without Damaging the Wall Later
Protect the Art from the Three Biggest Enemies: Heat, Moisture, and Abrasion
Heat softens many adhesives. Moisture can creep under edges. Abrasion scuffs the surface and weakens the visual finish. That’s why wall art near radiators, kitchen steam, or frequently touched hallways tends to age faster than the same piece in a bedroom. If you know the wall will take wear, choose a more durable face film or a protected print surface.
Routine care should be gentle. Dust with a dry cloth. Avoid harsh scrubbers and solvent cleaners unless the manufacturer specifically allows them. On matte finishes, even mild abrasion can create shiny spots that are hard to reverse.
Understand Where the Method Works Well and Where It Fails
This method works well on smooth, paintable wall surfaces and for spaces that change often, such as apartments, dorm-style rooms, home offices, and short-term leases. It fails more often on chalky paint, textured plaster, humid bathrooms, and walls that were painted very recently. If the wall is already compromised, even a good adhesive cannot save the project.
That limitation matters. Temporary décor is not a cure-all. If the substrate is wrong, the best design in the world will still fail mechanically. Good installers respect the wall before they respect the design.
Use Reputable References for Removability and Surface Care
For install-and-remove methods, follow the product’s tested guidance rather than crowd advice from generic craft videos. Manufacturer instructions for removable adhesives, plus practical paint-care references from organizations like This Old House, are far more reliable than guesswork when a lease deposit is on the line. You should also keep a small record of what wall paint and adhesive you used so removal is easier later.
That record becomes useful when you move. The renter who remembers the exact brand, finish, and installation date usually has a much smoother removal process than the renter who only remembers “it was some peel-and-stick thing.”
| Surface Type | Adhesion Risk | Removal Risk | Best Use Case |
|---|---|---|---|
| Smooth eggshell paint | Low to moderate | Low | Living rooms, bedrooms |
| Matte paint | Moderate | Moderate to high | Small accent pieces, test areas |
| Heavy texture | High | Moderate | Usually avoid for seamless panels |
| Freshly painted wall | Very high | Very high | Wait until fully cured |
Removing It Cleanly and Repairing the Wall the Right Way
Remove Slowly, at the Right Angle, and with the Right Temperature
When it is time to take the art down, resist the urge to yank. Slow removal at a low angle reduces paint lift. Mild warmth from a hair dryer can help soften the adhesive, but keep the heat moving so you do not blister the paint. Pulling straight out from the wall is the fastest way to damage the finish.
If a section resists, stop and re-warm it. The wall should release gradually. That patience pays off in clean edges and fewer repair spots, especially if the paint is older or the adhesive had more bite than expected.
Repair Small Paint Failures Before They Spread
After removal, inspect the wall under angled light. Small nicks can be touched up with matching paint, but only after the surface is dust-free and dry. If a thin paint film lifted, feather the edges before patching so the repair blends. Larger failures may need a spot prime first, or the touch-up will flash differently from the surrounding wall.
That is one reason I always tell renters to save a little original paint, if possible. Even a tiny leftover sample can make a repair look intentional instead of obvious.
Know When Another Solution is Smarter
Not every rental wall should carry a peel-and-stick system. If the wall is fragile, highly textured, or part of a historic or premium finish, framed art, leaners, or removable gallery rails may be safer. The right choice is the one that preserves the wall while still giving you the design outcome you want.
There is no prize for forcing adhesive onto a bad surface. The smartest decorator is often the one who knows when to switch tools.
Common Mistakes, Cost Drivers, and Better Alternatives
Don’t Confuse Cheap with Renter-safe
Low-cost adhesive décor often fails because the material and backing were never tested for real apartment conditions. A bargain product may look identical online, but the coating, tack level, and release behavior can be very different once installed. If the backing feels overly aggressive in the package, it will probably be aggressive on the wall too.
Cost is not just the price of the sheet. It includes replacement, wall repair, your time, and the risk of a bad lease handoff. High-quality removable materials tend to cost more up front because they are engineered for predictable release and better edge stability.
Know the Trade-off Between Seamless Looks and Easy Removal
A seamless mural system often looks better than separate panels, but it can be harder to install and more sensitive to alignment errors. A modular panel approach is easier to correct and may be safer in rentals, though the joins may be more visible. That’s the central trade-off. You usually cannot maximize both visual seamlessness and removal ease at the same time.
If your apartment changes often, I would prioritize reversibility over absolute perfection. If you plan to stay for several years and the wall conditions are excellent, you can justify a more ambitious build.
Use a Decision Rule, Not Impulse
Before starting, ask three questions: Is the wall fully cured and smooth? Does the product explicitly support removable use? Is the visual payoff worth the removal risk? If the answer to any of those is no, choose a different format. Framed artwork, removable hooks, or a lightweight fabric print can solve the same design problem with less exposure.
Next Steps for a Better Rental-Friendly Installation
The strongest approach is to treat temporary wall décor like a small interior project, not a craft experiment. Start with the wall condition, choose the substrate based on finish and removal risk, and install only after the surface is clean and fully cured. That sequence is what separates durable results from the kind of work that looks fine on day one and fails by month three.
If you want a custom, high-end look in a rental, keep the method simple and the standards high. The best removable wall treatment is the one that still looks intentional after lighting changes, humidity swings, and a move-out inspection. That means using the right material, respecting the wall, and favoring clean reversibility over clever shortcuts.
For the next project, test one hidden patch first, document the paint and adhesive used, and install only after that test performs cleanly. That small discipline is the difference between temporary décor that feels expensive and temporary décor that feels temporary.
Frequently Asked Questions
What is the Safest Wall Finish for Peel-and-stick Wall Art in a Rental?
Satin and eggshell paints are usually the most forgiving balance of adhesion and removability, especially on smooth drywall. Matte paint can hold well, but it often lifts more easily during removal because the coating is softer. Fresh paint is the biggest risk; wait until it has fully cured before applying anything adhesive. Always test a hidden area first, because paint formulation matters as much as sheen.
Can Peel-and-stick Wall Art Damage Apartment Walls?
Yes, it can damage the wall if the adhesive is too aggressive, the paint is under-cured, or the surface is fragile. The risk is highest on flat paint, heavy texture, and walls that were recently painted. Proper removal helps a lot, but no removable system is zero-risk. The safer approach is to pair low-tack materials with careful prep and a slow removal method.
Is Peel-and-stick Vinyl Better Than Fabric for Renters?
Not automatically. Vinyl gives sharper graphics and stronger color saturation, while fabric often installs more forgivingly and can be easier to remove cleanly. For a rental, fabric is often the safer choice if the wall is delicate or the install is large. Vinyl makes more sense when you need crisp detail and the wall surface is very smooth.
How Long Will Removable Wall Art Last Indoors?
With good prep and normal indoor conditions, it can last for years. The real enemy is not time alone; it is heat, humidity, dust, and edge stress. A well-made installation in a bedroom may last far longer than the same material near a kitchen or sunny window. Longevity depends more on the room and surface than on the word “peel-and-stick” itself.
What Should I Do Before Removing It at Move-out?
Warm the piece gently, peel slowly at a low angle, and stop if the paint starts to lift. Keep a matching touch-up paint ready if you can, because small repairs are easier when handled immediately. If any adhesive residue remains, use the manufacturer’s recommended cleaner rather than a random solvent. The goal is to leave the wall looking like it was never altered in the first place.